Thursday, November 20, 2014

Low Carb Flax and Coconut Personal Pancake


Low Carb Flax and Coconut Personal Pancake


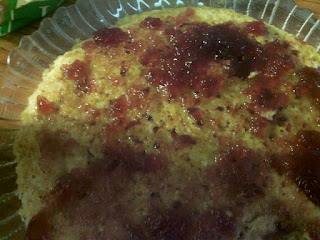
So I was wanting something both high fiber and high protein for breakfast.  I pulled the ingredients out that I was interested in using and mixed them together.  My daughter walked in while it was cooking and asked, "What's that?"  To which I replied, "I don't know!"  Well, once it was done and I tasted it, I decided it was definitely a pancake.  I spread some all-fruit spread on it and enjoyed it as such.  I hope this helps someone else along their way :)

Low Carb Flax and Coconut Personal Pancake
Serves 1

In a bowl mix well:

2 eggs
1/8 teaspoon sea salt

Add and mix well:

1/4 cup ground flax seed meal (use almond flour for SCD)
2 tablespoons shredded coconut -- mine was pretty finely shredded, not the big chunks that are called shredded, but neither was it finely ground.  I'd say, "medium grind."
2 packets Stevia based sweetener* (or 1 tablespoon honey for SCD)
1/2 teaspoon vanilla extract

Pre-heat a small frying pan with 1 tablespoon coconut oil.  Pour the batter into the pan as soon as the oil melts.  Cover it and cook it over medium low heat for about 3 minutes or until the top of the pancake can be touched and it's no longer sticky.  It can be flipped if a browned appearance on both sides is desired.

Place the pancake onto a plate and top as desired:  Sugar free syrup, peanut butter and jam, jelly, etc.  (Not for SCD -- for SCD, peanut butter and honey would be great!)

*Note:  This would be good without toppings, too.  Use an additional 2 packets stevia sweetener, (or another tablespoon of honey for SCD), and 1/4 teaspoon cinnamon in the batter. 

As I said, I put all-fruit spread on mine.  Enjoy!


Monday, November 3, 2014

Simi's Cookies -- four (4) ingredient cookies


Simi's Cookies -- four (4) ingredient cookies


Simi's Cookies

Simi is two years old and has a boatload of food allergies.  His family was here for a visit, and his mommy forgot to bring his special cookies.  I verified what ingredients he could tolerate and came up with these easy-peasy cookies.  He, (and his mommy who is allergic to eggs), thought they were pretty delicious :)

Simi's Cookies are very simple -- with only four (4) ingredients.  They have a "flour" base, some "butter", flax seed mixed with water, and sweetener.  The flour could be just about any "flour,"  like almond, rice or ground oats.  The butter could be anything from coconut oil, to butter or margarine, like we had to do for Simi.  The flax seed and water stands in for the eggs, and we used honey for sweetener because it's safe for him, but I think just about any sweetener -- agave, coconut sugar or organic sugar would work.  These could easily have other optional ingredients like a tablespoon or two of nuts, raisins or chocolate or carob chips added.  Have fun with it!

Simi's Cookies
Makes about a dozen cookies

Pre-heat oven to 375F.

In a medium sized mixing bowl, cream together:

1/3 cup raw honey (or other tolerated sweetener)
1/3 cup Earth Balance Spread (or other solid fat)

Combine in a small cup or dish:

1 teaspoon ground flax seed plus 1 tablespoon water.  Allow it to gel a minute or so.  Add to the honey mixture and stir well.

Add a little at a time until cookie dough consistency:

3/4 cup whole wheat flour (or other well tolerated "flour")

Scoop by tablespoonfuls onto a baking sheet sprayed with cooking oil spray or onto a parchment lined sheet.  Tap the tops of the dough balls with fingers so they will flatten during baking.  Bake about 11 minutes or until they are becoming golden.  Cool on paper towels.  Enjoy!

Simultaneously published on my other blog here.

Saturday, September 13, 2014

Delicious Toasted Coconut Chips

Delicious Toasted Coconut Chips


I was wanting something tasty and coconut-ty.  This was so easy!  Sweety and Cinnamony Coconut Chips -- It's even nutritious :)

Delicious Toasted Coconut Chips
Makes 2 cups

Have everything ready because this goes quickly: 2 cups coconut flakes (chips), and in a separate container 3 tablespoons coconut (palm) sugar combined with 1/2 teaspoon ground cinnamon and a dash of salt.

Heat a medium sized skillet over medium heat.  Make sure it is either a well-seasoned cast iron or non-stick, (cast iron preferred.)   Put the coconut chips into the hot skillet and stir them for about 30 seconds.  They will already be browning.

Quickly add the coconut sugar mixture.  Stir it constantly until the sugar has melted and there is no longer any loose in the pan.

Remove the coconut chips to a bowl to cool.  They are delicious both warm and cooled.  I think this would be great with about 3/4 cup blanched slivered almonds added.

Enjoy!

Monday, August 25, 2014

Tyrosine and aloe

I've been struggling with pretty severe chronic fatigue / fibromyalgia symptoms since we moved earlier this year. I've actually been taking L-Tyrosine for a while, but really hit or miss.  I didn't know what it was supposed to do. I looked up the info and was amazed. It's a naturally occuring amino acid and it helps fibromyalgia, depression, chronic fatigue, having energy after sleepleness nights, and other things. Here's a link for information. I think it's available at WalMart or just about anywhere else. It's called L-tyrosine. I've been more purposeful about taking it and am feeling much better. My daughter even said the other day, "It's good to have you back!!" It's good to be back...

WebMD article about Tyrosine (update 9-22-14:  It's still a decent article, but they seem to have removed some of the original information they had.)

This article is not one I originally read, but it has the information I remember from the original articles I researched.  I hope this helps:  Article about l-tyrosine.

Here's my referral code for PureFormulas if you want to order online.  They are very reasonalble, have excellent quality products and free shipping.  Here's a pic of the Now brand Tyrosine.


Also, I'd like to share information about another helpful product for people with interstitial cystitis.  I've had success with aloe juice and so has my sister.  She takes it for kidney pain and Crohn's disease.  It helps with urgency and seems to help with other symptoms for people.  I use just the inexpensive Fruit of the Earth brand from WalMart.

...just thought I'd pass along some helpful information!

Blessings,
Sharron

Tuesday, April 22, 2014

Almond Cheese Coffee Cake with Streusel Topping

Almond Cheese Coffee Cake with Streusel Topping


This is so yummy!  I have no idea why this type of cake is called a "coffee cake" since it doesn't have anything to do with coffee...?  Anyway, it is delicious!  It is gluten (grain), dairy and soy free.  I don't think anyone would ever know the difference.  I think this dish is going to my next brunch.

Almond Cheese Coffee Cake with Streusel Topping
Makes about 12 servings

Pre-heat the oven to 350F or 325F if using a dark colored pan.  Spray an 8"x8"x2" pan with cooking oil spray.

In a bowl combine then set aside:

1 1/4 cups almond flour
1/4 cup potato flour (for low carb, use additional almond flour)
4 packets Truvia-type sweetener (I use the Kroger brand)
3/4 cup coconut sugar
2 teaspoons gluten free baking powder
1/2 teaspoon baking soda
1/4 teaspoon sea salt

Beat well with an electric mixer:

1 cup almond cheese (I was a little short, so I made up the difference with some pear juice, and it was just fine.)
2 eggs

Gradually add the dry ingredients, (above), into the cheese/egg mixture until it is incorporated.  Spread the batter in the prepared pan.

Combine in a bowl and sprinkle over the cake batter:

2 tablespoons almond flour
2 tablespoons unsweetened shredded coconut
1/4 cup coconut oil
1/8 teaspoon sea salt (if nuts are unsalted)
1/2 cup coconut sugar
2 packets Truvia-type sweetener (as above)
1/2 cup nuts (blanched slivered almonds, chopped walnuts or cashew pieces.  I used cashew pieces.)

Bake at 350F, or 325F if using a dark colored pan, for about 20 minutes or until a knife inserted in the center comes out clean.  Cool the cake for about 10 minutes before cutting and serving.  Store any leftovers covered in the refrigerator.  It is, also, excellent chilled.


Enjoy!

Monday, April 21, 2014

Potluck Breakfast Casserole plus a Pork Sausage Recipe


Dairy-free Potluck Breakfast Casserole
Pork Sausage Recipe


We had a breakfast pot luck at our church on Easter morning this year.  I brought this breakfast casserole.  Folks said they really enjoyed it.

Dairy-free Potluck Breakfast Casserole
Serves about 12 or a good size for a potluck dish 

This recipe uses leftover baked potatoes and homemade pork sausage for an easy assembly.  (The casserole part of this recipe is not SCD legal.)

The first item of business is to make the pork sausage.  It's quite simple to put together and then there's no risk of unnecessary chemicals.

Pork Sausage Recipe (SCD legal and low carb)

Cook and crumble 2 pounds lean ground pork.  Season it with:

1 1/2 tablespoons Adobo seasoning without pepper
1 teaspoon sea salt
1 teaspoon garlic granules (or 2 cloves garlic, minced)
1/2 teaspoon dry mustard powder
1/2 teaspoon celery seed
3/4 teaspoon thyme flakes


(The remainder of this recipe is not SCD legal or low carb) To make the casserole:

Put 1/2 of the sausage into the bottom of the crock.

Shred 4 to 5 medium sized cold baked potatoes as for hash browns.  Divide them in half.  Distribute 1/2 of them evenly over the sausage.  Season them with about 1/2 teaspoon Adobo seasoning and 1/2 teaspoon sea salt.  

Slice 4 to 6 medium sized mushrooms.  Arrange 1/2 of them over the potatoes in the crock.  

Repeat the layers as above.

In a mixing bowl combine 12 eggs and about 1 cup almond milk or whey (I had just made almond cheese, so I had a cup of whey on hand.)  Add to it 3/4 teaspoon sea salt and 1 1/2 tablespoons parsley flakes.  Mix it well and pour it over the ingredients in the crock pot.


The liquid should just cover the other ingredients.  If it doesn't add just enough the cooking juices from the sausage to cover them.  Cook the casserole on low overnight, approximately 8 hours (4 hours on high) until it is solid in the center and bubbling around the edges.


When it is done, reduce the heat to warm.  The casserole will absorb the excess liquid once it is no longer simmering.


Enjoy!


Friday, April 18, 2014

Almond Cheesecake with Blackberry Topping -- Dairy and Gluten free!


Almond Cheesecake with Blackberry Topping


Yes I did!  I used the almond cheese recipe from this post and created a completely dairy free and gluten (grain) free cheesecake.  I didn't allow the cheese to "ripen" so there isn't the customary "tang" that a cheesecake has.  That could be done, it would just require an additional day for the cheese.  The way I did it, it tasted more like an almond cream pie to me.  However, one of my guests didn't even know there was anything "different" about it at all.  She just thought it was a cheesecake with blackberry topping!

Almond Cheesecake with Blackberry Topping
Makes about 12 servings

Note:  All ingredients should be at room temperature unless otherwise stated.

The first step in this recipe is to make the cheese, as instructed here.  Just let it drain in the cloth lined colander until the whey has easily finished dripping.  I just let mine set while I was preparing the crust.  Do not discard the whey.

To make the crust, combine in a mixing bowl with an electric mixer:

1 1/4 cups ground almonds
1/4 cup chickpea flour (or potato flour)
1/3 cup coconut sugar
8 packets Truvia-type sweetener (I use the Kroger brand)
1/8 teaspoon sea salt

Add and mix until crumbly:

1/3 cup plus 2 teaspoons coconut oil

Add approximately: 

2 tablespoons very cold water

Mix until the dough just combines and clings to the beater.  Press the dough into a 10" pie pan with damp fingers.  The fingers might need to be rinsed during this process.  When the crust is completed, put it into the refrigerator to chill while making the cheesecake filling.

Pre-heat the oven to 375F.

To make the cheesecake filling, combine in a mixing bowl with an electric mixer and beat about 2 minutes until light:

3 cups almond cheese (see above)
1 tablespoon vanilla extract (I make my own)

In a small bowl combine:

16 packets Truvia-type sweetener
1/3 cup coconut sugar
2 tablespoons potato flour
1/4 teaspoon sea salt

Gradually add these dry ingredients to the almond cheese mixture, beating only until combined.

In another small dish, combine well:

3 eggs
1/4 cup reserved whey (from the cheese making process, above)

Add the eggs and whey mixture to the almond cheese mixture, and mix it until it is just combined.

Assembling the cheese cake: 

Remove the pie crust from the refrigerator, and pour the cheesecake filling into the prepared crust.  Smooth the filling with the back of a spoon or spatula.  Bake it at 375F for about 20 minutes.  It should be slightly jiggly at the end of that time and not browned.  Leave the cheesecake in the oven and turn the oven off, leaving the door slightly ajar, for about 20 minutes.  Remove the cheesecake from the oven and cool completely on a wire rack, then chill it in the refrigerator for at least 4 hours.

Putting the blackberry topping onto the cheesecake:

About an hour before serving, heat one - 11 ounce jar of fruit only type blackberry jam in a small pan over medium heat until it is softened. 

Pour the jam over the cheesecake and smooth the top.  

Cover the cheesecake with a piece of plastic wrap and return it to the refrigerator.

Remove the cheesecake from the refrigerator about 5 minutes before serving.  Slice it into 12 even pieces and serve.  Enjoy!

Carnitas -- Mexican style Roast Pork


Carnitas -- Mexican style Roast Pork


I think carnitas are one of my favorite Mexican foods.  I've made several versions of this recipe, but I think this is my favorite.  I adjusted it from a standard recipe to  have much less cumin.  Cumin can be bladder irritating for some.  If it is bothersome, just omit it.

Carnitas -- Mexican style Roast Pork

I had about an 8 pound pork shoulder roast that I started with for this recipe.  Most roasts are only about 3-4 pounds.  For such a smaller roast, just halve the seasonings.

In a small bowl, combine

1 1/2 tablespoons Adobo seasoning 
1 tablespoon sea salt
1 teaspoon cumin (may be omitted)
1 tablespoon ground oregano
1 tablespoon garlic granules

Set this aside.

Cut the pork roast (mine was about 8 pounds) into 2" cubes.  (I had to pre-bake mine partially because it was frozen.)  Place the meat into a container large enough to hold it.  Pour 1/3 cup olive oil and 1/2 cup water over the meat.  Sprinkle the seasonings and stir it well to fully distribute the spices.  Cover the container and refrigerate it over night.  

When ready to cook the meat, remove it from the container and arrange it in a single layer in a roasting pan.  Cover the roaster, and bake it for about 3 hours at 300F.  The Carnitas are done when the meat is a deep reddish brown and falls apart easy when poked with a fork.  The smell will be amazing!


The meat can then be served alone as a main dish or in any sort of Mexican food like tacos, taco salad, etc.  Enjoy!

Thursday, April 17, 2014

Golden Flax Chicken Strips -- Baked and Gluten Free


Golden Flax Chicken Strips -- Baked and Gluten Free


So I have this basic breading recipe that I use for pretty much everything.  I had 1/2 cup of it leftover and had a package of chicken strips.  I thought, "I can make this breading healthier and probably not change the taste much by adding flax to it!"  ...and that's what I did.

Golden Flax Chicken Strips -- Baked and Gluten Free
Makes about 3 servings

Pre-heat the oven to 400F.  Spray a baking sheet with olive oil cooking spray, or use parchment paper for even easier clean up.

Place 3/4 pound of chicken strips (tenders) on a plate and season them with sea salt, as desired.

Pour about 1/4 cup olive oil into a small dish.

Combine in another dish:

1 cup Utz Potato Sticks (available at Wal-Mart) ground to 1/2 cup
1/4 teaspoon thyme flakes
1/2 tablespoon potato flour
1/2 cup ground flax seed 

First dip the chicken pieces into the olive oil then into the breading mix.  Place the coated pieces onto the baking sheet, so they don't touch.

Bake the chicken strips at 400F for about 12 minutes or until they are golden brown and crispy.

I dipped mine in Dilly Ranch with radishes on the side.  Yum!

Thursday, April 10, 2014

Golden Cashew Coconut Cookies

Golden Cashew Coconut Cookies

These little babies are good!  They remind me of the frosting from German Chocolate cake.  Yummy!  Of course, they are gluten and grain free, soy and dairy free.  


Golden Cashew Coconut Cookies
Makes about 2 dozen

Pre-heat the oven to 350F, and line a baking sheet with parchment paper.  Set it aside.

In a mixing bowl with an electric mixer, beat:

2 eggs

Add and continue beating:

1 cup coconut sugar
1/3 cup date sugar*

Add and mix well:

1 tablespoon plus 1 teaspoon coconut oil
1/2 teaspoon vanilla extract (I make my own.  Recipe here)
1/2 teaspoon sea salt
1 cup unsweetened shredded coconut
1/3 cup cashew pieces
3/4 cup almond flour
1/4 cup ground flax seed

Scoop by small scoopfuls, (2 tablespoon size), onto the parchment lined sheet about 2" apart.  Flatten the tops of the cookies, and bake them at 350F for about 10 minutes.  

Allow them to rest on the baking sheet for 3 to 5 minutes, then transfer them to a paper towel to continue cooling.  

Store covered with waxed paper or paper towels between the layers.  Enjoy!

*For low carb, use just coconut sugar

Note:  The oranges were just for the photo shoot.  Don't eat them on a low-acid diet.


Wednesday, April 9, 2014

Asparagus broth aka Asparagus Tea

Asparagus broth for soup making


I don't know about other people, but I always feel so guilty about throwing out the tough pieces of the asparagus.  I've heard some people say the tough woody ends can be peeled and cooked with the rest of the asparagus.  Have they ever tried to peel a skinny little asparagus bit??  I couldn't do it, that's for sure!  Then I had the idea of boiling the ends and using them as a stock for soup making. 


Asparagus broth for soup making, aka Asparagus Tea

Reserve the cooking water from cooking the whole asparagus, then add the broken-off ends.  Fill the pot with water, cover it, and bring it to a boil.  

Reduce the heat to a simmer and continue to cook the ends for about an hour or more.  When the broth is done, the cut ends will have sunk to the bottom of the pot. 

Strain the broth and discard the asparagus ends.  Use for broth in soup or stew.  When I've done this, people have raved about the soup!

Enjoy!

Gluten and Dairy Free Pizza Recipe

Gluten and Dairy Free Pizza Recipe


Yes, I did!

This recipe took care of my pizza craving.  I hope it helps others, as well.  The crust could be used as a basis for any sort of "biscuit" type crust.

Gluten and Dairy Free Pizza Recipe
Makes 4 servings

Pre-heat the oven to 375F.


In a mixing bowl with an electric mixer, combine

1 1/2 cups almond flour
3/4 cup besan (chickpea, lentil, garbanzo bean) flour
3/4 cup potato flour
1 teaspoon sea salt
1 tablespoon gluten free baking powder 

Add and mix until crumbly

2 tablespoons olive oil
1 egg

Add and mix until dough just cleans the bowl

3/4 cup almond milk (I used the whey from the cheesemaking process)

Spray a 9" pan with olive oil spray.  I used my cast iron frying pan.  Press the dough into the bottom and up the sides.  Prick the dough with a fork and bake it for about 6 to 9 minutes, or until it is just firm and no longer sticky to the touch.

At this point, the crust can be used for whatever purpose is desired that is appropriate.

To make the finished pizza as pictured above, I put in some of the Cheese-flavored Non-dairy Cheese Spread and spread it with the back of a spoon over the crust.  After that, I put cooked pork sausage (uncured without chemicals), shrimp, broccoli and mushrooms over the cheese.  I sprinkled it with Italian seasonings, sprayed it with olive oil spray and garnished it with some more "cheese."  My original intention had been to make a calzone, but I should have used a smaller pan.  I still think this basic recipe would work for a calzone.

Baked at 375 for about 9 to 11 minutes, this is what it looked like.

Enjoy!

Shrimp Cheese Dip -- Dairy and Soy free


Shrimp Cheese Dip -- Dairy and Soy free

This is a simple recipe that stems from my original Almond Cheese recipe.

In a food processor combine

1/2 cup Cheese-flavored Non-dairy Cheese Spread 
1/4 cup cooked shrimp meat
1/2 teaspoon dill weed
1/4 teaspoon sea salt

Serve as a dip or spread.  Store covered in the refrigerator.  Enjoy!

Almond Cheese -- Dairy and soy free semi-soft cheese


Almond Cheese -- Dairy and soy free semi-soft cheese


For some time now, I've thought that there must be a way to make a non-dairy cheese that I could use.  All of the pre-made ones I've seen at the store have things in them to which I am sensitive.  After doing some research online, I came across a couple of recipes that I thought I could modify.  The following is the result.  I hope it helps someone!


Almond Cheese -- Dairy and soy free semi-soft cheese
Makes about 1 1/2 cups cheese

In a blender container combine 2 cups blanched almonds, (I cheat and purchase mine already blanched), and about 3 cups filtered water.  Blend them until the almonds are smooth, as shown above, adding more water if necessary to keep the blender going.  Just at the end, add the powder from 2 caps of probiotics capsules.

Line a colander with a cheesecloth, or, if you are like me and don't have any, a good, clean paper towel will work.  Place the lined colander over a bowl that is large enough to hold it, so the whey can drain from the cheese.  Pour the pureed almonds into the lined colander and cover it so nothing will fall into it.  I used a plate.

Allow the whey to drain over night, up to a couple of days, depending on the consistency of the cheese that is desired.  

I had to add some weight to get it to strain -- I placed a mug on top and then I put it into another clean cloth towel and squeezed as much of the whey out as I could.  The whey can be saved to use in another project like this gluten and dairy free pizza crust.

This is the cheese in its "final" state after draining.  At this point, it could be used for many different things.  It is much like cream cheese or a semi-soft cheese.  It is great in this Almond Cheesecake with Blackberry Topping!  Enjoy!


Sauteed Steak and Veggies


Sauteed Steak and Veggies


This is a simple, yet delicious dinner choice.

Sauteed Steak and Veggies
Serves 2

Cut up one 8 ounce piece of steak into about 1" pieces.  I like to use chuck eyes because they are inexpensive for a good piece of steak.  Season it with Adobo seasoning and allow it to rest for about 20 minutes.

While the steak is resting, cut up 

1 - 6" zucchini
6 - 1" mushrooms
1 clove garlic

Heat in a 10" skillet over medium heat 

2 tablespoons coconut oil
2 tablespoons olive oil
1/4 teaspoon dill weed
1/4 teaspoon celery seed

Add the meat and cook it until it is just browned.

Add the veggies and cook them until they are just becoming soft.  Serve immediately.  Add sea salt to taste.

Enjoy!

Dilly Garlic Butter -- Non-Dairy and soy free


Dilly Garlic Butter


Re-learning how to cook once I went off of "everything" has been a challenge. Of course, I haven't gone off of everything, but sometimes it sure feels like it. For instance, I can't find any sort of commercially prepared butter-type spread that doesn't have something in it to which I'm sensitive.  So here's when ingenuity comes in!  Normally, for flavoring cooked vegetables, I just pour on some olive oil and season them with Adobo.  However, I was eating artichokes the other day and needed something to dip them in, so I made this up.

Non-dairy, soy free, Dilly Garlic Butter
Makes about 1/2 cup


In a small saucepan, combine

1/3 cup coconut oil
1 1/2 tablespoons olive oil (I use the pure or light tasting variety)
1/4 teaspoon dill weed
1/4 to 1/2 teaspoon sea salt (to taste)
1/4 teaspoon garlic granules
Pinch turmeric (for color)

Mix the ingredients together and heat them over medium-low heat until they are melted.  Serve with fish or veggies.

The "butter" can be used chilled as well.  If a spreading consistency is desired, double the olive oil in the recipe.

Enjoy!

Crispy Breaded Baked Veggies


Crispy Breaded Baked Veggies


This is a fairly simple way to make a yummy treat -- and definitely healthier than the deep-fried variety.  Most breaded, crispy veggies are wrapped in gluten, but not these!  I used Utz Potato Sticks, but one could use ground almonds, as well.  For this recipe, I used zucchini and mushrooms, but other veggies could, also, be used.

Crispy Breaded Baked Veggies -- gluten free, of course!
Makes about 4 servings

Pre-heat the oven to 400F.  Slice and place into a colander

1 - 6" zucchini
5 - 2" mushrooms

Salt them well and let them rest for about 20 minutes, shaking them occasionally.  At the end of the 20 minutes, a lot of the excess moisture will have been drawn out by the salt.  Rinse the veggies and set them aside.

Prepare the topping by processing in a food processor

2 cups Utz potato sticks (or gound almonds would work, as well)
1 teaspoon thyme flakes
1/2 tablespoon nutritional yeast (for a cheesy taste, optional)

Spray the veggies with alive oil cooking spray or dunk them in a bit of olive oil.  Coat them in the breading by placing about 2 tablespoons of the breading mixture into a small dish or plate and shake it side to side.

Spray a baking sheet with cooking oil spray and lay the slices out one-by-one on the pan until they are all coated with the breading mix.  Bake them for about 15 minutes at 400F or until they are golden and crispy.

Enjoy!

Tuesday, April 1, 2014

Delicious Gluten Free Carob No Bakes!


Delicious Gluten Free Carob No Bakes!


This recipe came about because I was wanting something sweet and easy. I've been having this recipe rumble around in my brain for a couple of weeks now.  Finally, I had the time to make it.  

It is gluten free, grain free, dairy free, soy free, peanut free, and I think it is delicious!  It does use Utz Potato Sticks, but those could be substituted with more nuts or coconut flakes.  I put them in there for the crunch factor!


Delicious Gluten Free Carob No Bakes!

In a medium sized sauce pan, combine, and bring to a boil:

1/3 cup agave nectar*
1/3 cup coconut sugar

*To keep sticky things like agave nectar from making a huge mess with measuring cups, first spray them with a little cooking oil spray.  They'll come right out.

Remove the pot from the heat, and stir in all at once:

1/3 cup raw almond butter
1/4 cup unsweetened carob chips


Add the following ingredients and mix them thoroughly.  At first I didn't think there would be enough sauce, but I kept mixing and it covered all of the dry ingredients completely:

1 cup Utz Potato Sticks
1/2 cup coconut chips (or shredded coconut), unsweetened
1/2 cup slivered almonds

Scoop by about 2 tablespoons full onto either waxed paper or parchment.  I used my normal 1/4 cup scoop and just filled it half-way.

Store them covered with waxed paper or parchment between the layers.


Enjoy!

Beef N Veggie Soup aka, RX in a pot!

 Beef and Vegetable Soup, RX in a Pot!


This is my "go to" soup recipe when I'm not feeling well.  Don't get me wrong, it's not just for sick days -- it's a very delicious soup!  However, I created the recipe with certain goals in mind.  The soup is made from bone broth with is very beneficial when fighting infections and generally boosting the immune system (See Weston A Price Foundation on the topic.)  The veggies are all beneficial to the kidneys and bladder, as are the herbs.  The herbs included are specific for bladder conditions. It's great when I'm having an IC flare up to have a pot of this soup on hand!

Beef and Vegetable Soup, RX in a Pot!
Makes about 6 servings


Cover about 1 1/2 pounds of beef shank or ox tails with about 8 cups water. It's important to have beef with the bones in, and preferably the marrow, as well. Cover the pot and bring it to a boil.  Skim off any foam from the top of the broth and discard it.  These are the impurities in the soup that often make soup taste bitter.  Turn the heat down so the soup simmers with the lid on, about medium-low, for 45 minutes to 1 1/2 hours, depending on available time.*

*At this point the meat can be removed from the bones and set aside and the bones continue to be cooked in the broth for several more hours.  If that is the case, be sure to add more water, so it doesn't all evaporate.

Allow the meat to cool enough to handle.  Cut it into about 1/2" pieces and add it back into the broth.

Add the following to the soup.  All are 1/2" dice, unless otherwise indicated:

2 potatoes, peeled 
4 carrots, peeled 
1 sweet potato, peeled
4 ribs celery
1/2 head cabbage, cut into strips
4 cloves garlic, minced

The above will make soup like what is pictured.  However, there are so many choices of veggies that can be used.  Rutabagas, turnips, parsnips, golden potatoes, red potatoes, pumpkin, hard squash, kale, spinach, zucchini, yellow squash are all good choices, and I'm sure there are others.  The main thing being avoiding tomatoes and other acidic foods in this soup.

The herbs and seasonings I used for this pot were:

1 tablespoon parsley flakes
1 teaspoon coriander seeds*
1 teaspoon thyme flakes
1/2 teaspoon celery seed*
1/2 teaspoon fennel seed*
1 teaspoon Adobo seasoning
Sea salt, to taste

Other good choices would be oregano and or basil, if thyme isn't available.  The herbs listed with * are optional if unavailable, but are particularly soothing to the bladder.

Make sure the herbs and veggies are completely covered with water and allow the soup to cook for 1 1/2 to 2 hours.  When it is done, the meat and veggies should all be very tender and the broth a golden color.

Enjoy!

Thursday, March 20, 2014

IC Taco Salad, Gluten Free Taco Salad Shell

IC Taco Salad
Gluten Free Taco Salad Shell


IC Taco Salad

I finally did it!  I've been mentally "working" on this recipe for many months now.  Finally, last night, it came to pass.  This taco salad shell is made with besan (chickpea, lentil, garbanzo bean) flour.  It is low acid and gluten / grain free.  I hope others enjoy it as much as I did!

Gluten Free Taco Salad Shell 
Makes 1 shell and about 2 dozen chips

Pre-heat the oven to 325F.

Measure into a mixing bowl with an electric stand mixer (I would not recommend using a hand mixer as the dough is quite stiff!)

2 cups besan (chickpea, lentil, garbanzo bean) flour
1/4 teaspoon sea salt
4 to 6 tablespoons warm water

Mix it well, until a stiff dough forms.  Add more water if necessary to make the dough a workable consistency.  Knead the dough, with a dough hook if possible, for about 5 minutes until the dough is uniform.  Divide the dough into two equal balls.  

Spray a sheet of parchment paper with olive oil cooking spray.  Spray the dough and hands so the dough could be worked without being covered by it.  Work the first piece of dough into a ball and place it onto the sprayed parchment paper.

  Spray the ball with cooking oils spray again and cover it with the paper. Using a rolling pin or hands, flatten the dough into about a 10" circle.  Spray the bottom of a bowl that is big enough to hold the dough upside down with cooking oil spray and lay the circle of dough onto it.  Spray the dough with additional cooking oil spray.


Place the upside down bowl with the dough on it into the 325F preheated oven directly on the rack or it can be first place upon a baking sheet.  Bake the shell about 15 minutes or until it is crisped and lightly golden brown.  Remove it from the oven and cool it until it is touchable.  Carefully turn the bowl over so the shell comes off onto a dinner plate.


At this point, the shell is ready to be filled.  This is how I layered mine from bottom to top:

Homemade Refried Beans
Taco Meat
Easy Guacamole
Lettuce, cucumbers and radishes
Dilly Ranch 

And here it is...!


IC Taco Salad


Wednesday, March 19, 2014

Taco Meat for low acid and gluten or grain free diets

Taco Meat for low acid and gluten or grain free diets


Mexican food can really be a challenge on the IC diet and being gluten, grain, dairy and soy free.  Some things are easy to work around, like just leaving off the cheese.  However most taco meat (seasonings) have both soy and wheat in them, not to mention the chili powder!  I can't tolerate cumin, either, though it's on the "give it a try" list for the IC Diet.

This taco meat recipe is super easy and my family loves it.  I hope your's does, too!

IC Friendly Taco Meat
Makes about 20 servings (or 4 servings)

I had a 5 pound chub of ground chuck, so the recipe will be written for the 5 pound amount, with one pound amounts in parenthesis.

Start with either 5 pounds or one pound of ground beef.  Crumble it into a large pot that has a lid.

Cook the meat over medium heat, covered, about 10 minutes.  Stir, breaking up any of the chunks of meat.  Repeat the process until the meat is browned and the fat has separated out.  Turn off the heat and drain the beef.  Put it back into the pot.


Season the meat with:

2 tablespoons Adobo Seasoning
2 tablespoons oregano leaves
1 teaspoon sea salt

(For one pound:  
1 1/4 teaspoons Adobo Seasoning
1 1/4 teaspoons oregano leaves
1/8 teaspoon sea salt)

Stir it well, and serve it where ever one would use taco meat.  Pictured below is my Taco Salad topped with Dilly Ranch Dressing.